0Detect
This guide walks you through attaching a Mango Proxy to a 0Detect profile, testing the connection, and launching the browser under the desired IP.
Prepare the following before you start:
- Host and port (e.g.,
p2.mangoproxy.com:2333)- Username and password for the proxy
Helpful background reading:
- HTTP/HTTPS proxies
- SOCKS5 proxies
Overview
- Create a profile in 0Detect.
- Open the Connections tab and attach your proxy (SOCKS5/HTTP).
- Click Test proxy and verify IP/geolocation.
- Save the profile and launch the browser.
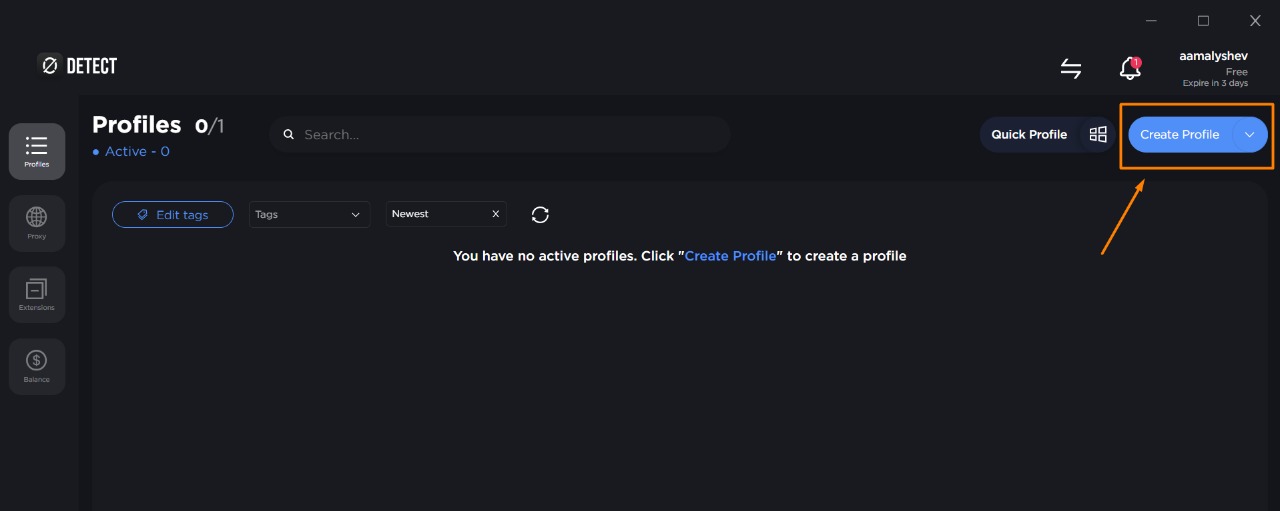
Step 1 — Create a profile
- Open 0Detect → Profiles.
- Click Create profile.
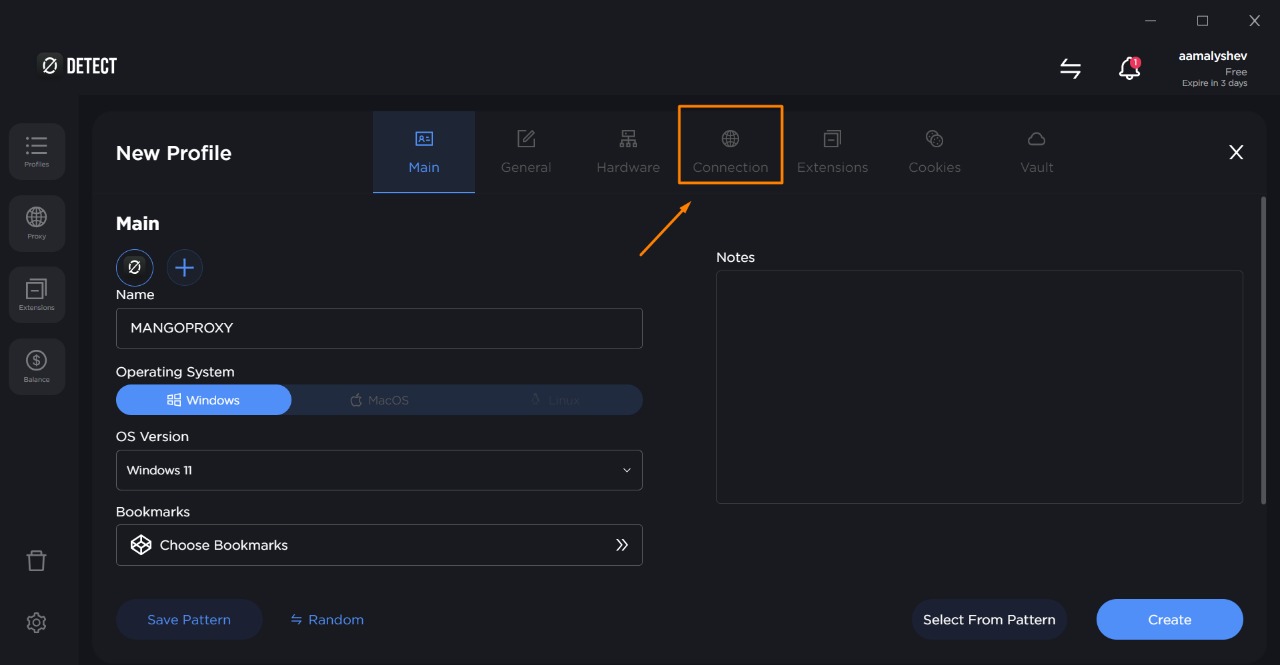
Step 2 — Basic settings → go to Connections
- Enter any convenient Profile name, e.g., MANGOPROXY.
- Choose the Operating System (Windows/macOS/Linux) and other options if needed.
- Switch to the Connections tab at the top of the wizard.
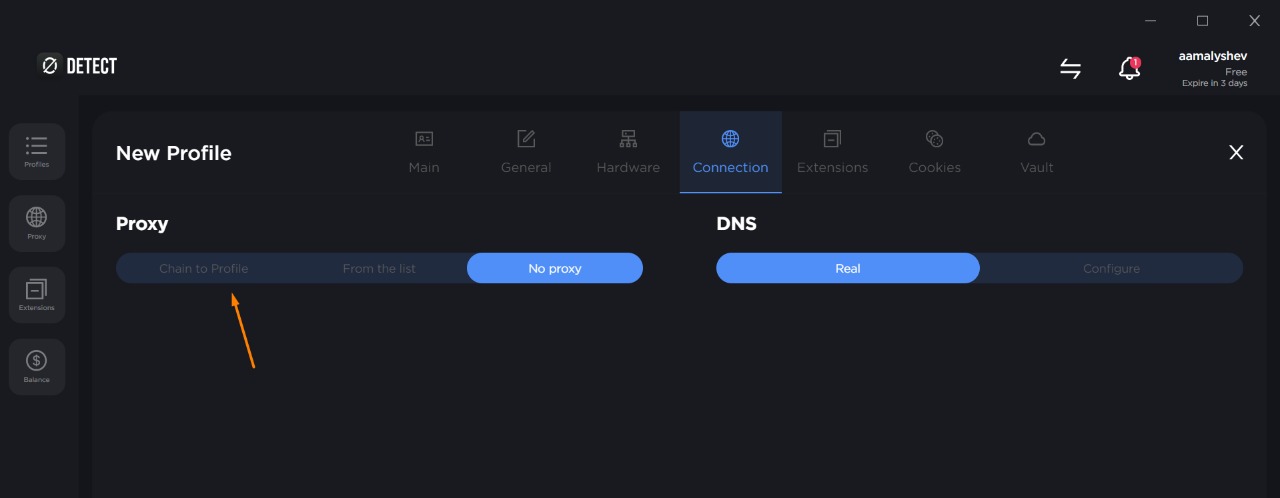
Step 3 — Choose how to attach the proxy
On the Connections tab, find the Proxy block and select Attached to profile.
This saves the proxy inside this specific profile, not in the global list.
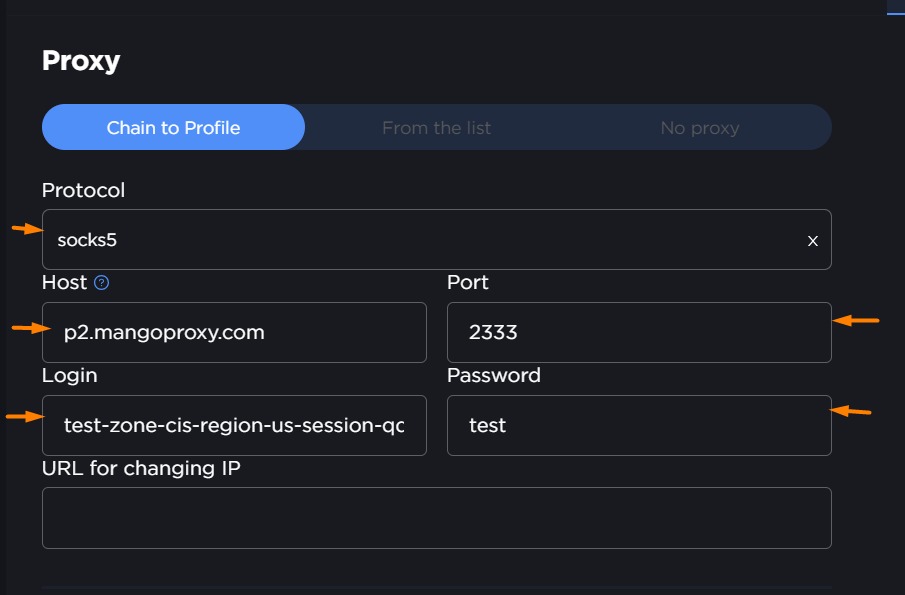
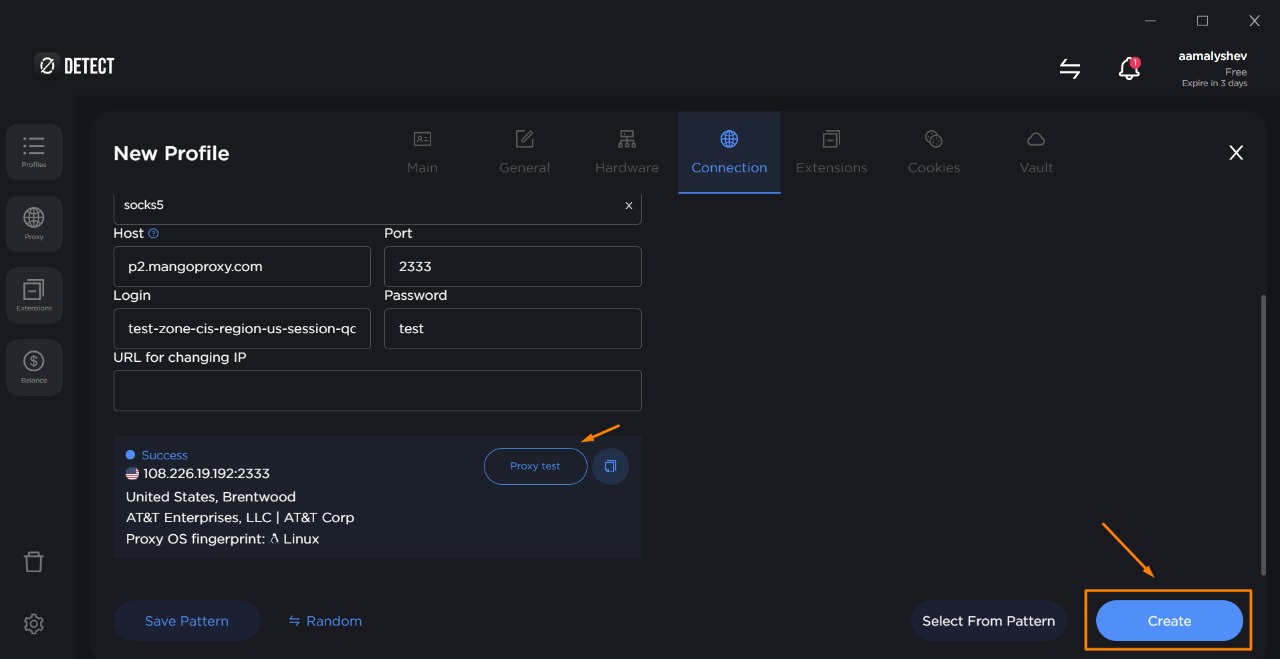
Step 4 — Enter proxy parameters
Fill the fields exactly as provided by Mango Proxy:
- Protocol:
socks5
(recommended; you may also usehttp/httpsif required) - Host:
p2.mangoproxy.com - Port:
2333 - Login: your proxy username (e.g.,
test-zone-cis-region-us) - Password: your proxy password
- URL to change IP (optional): rotation/sticky session URL if your plan supports it
Tip: If you prefer URI format, the equivalent strings are:
- SOCKS5:
socks5://USERNAME:[email protected]:2333- HTTP:
http://USERNAME:[email protected]:2333In 0Detect it’s safer to fill separate fields—less chance of typos.
Step 5 — Test and save
- Click Test proxy.
You should see Connected, the current IP, country/city, ASN, and the proxy OS fingerprint. - If everything looks good, click Create (or Save as template if you want to reuse these settings later).
Step 6 — Launch & verify IP
- Start the created profile.
- Open any IP checker:
https://ipinfo.io(detailed city/ASN)https://api.ipify.org(quick IP only)
- Make sure IP and geolocation match your Mango Proxy configuration.
DNS & leak considerations
In Connections → DNS:
- Real — use system DNS (fine for most use cases).
- Custom — set resolvers manually (e.g.,
1.1.1.1,8.8.8.8) or the provider’s regional DNS.
Useful if a target site is sensitive to mismatched IP vs DNS location.
Troubleshooting
“Test proxy” shows an authentication error
- Double-check username/password (case-sensitive).
- Ensure your proxy is active in the Mango Proxy dashboard and you haven’t hit session/traffic limits.
Connection succeeds but sites don’t load
- Confirm the protocol is correct (SOCKS5 vs HTTP/HTTPS).
- Temporarily disable ad-blockers/extra extensions—they may block requests.
- Try switching DNS: Real ↔ Custom (
1.1.1.1/8.8.8.8).
Need a long “sticky” session without IP change
- Use sticky sessions if your plan supports them.
- Add the rotation/sticky URL to change IP.
- Avoid running many profiles on the same session when your plan limits that.
Site complains about geography
- Choose a proxy location as close as possible to your target audience.
- For stricter platforms, also align profile language/timezone/locale.
Security tips
- Keep proxy credentials private; never include them in public screenshots.
- Create separate profiles for different projects/accounts.
- Keep 0Detect up to date.
Useful references
- System-wide proxy (route all OS traffic through a proxy):
- Per-browser setup (if you need proxy only in the browser):
- Why professionals need accurate geo proxies:
Why professionals need proxies
Where to store screenshots
Place images in static/img/0detect/ and keep the same filenames used in this article: