GoLogin
Why GoLogin with Mango Proxy is the perfect combination for multi‑accounting
Integrating the anti‑detect browser GoLogin with Mango Proxy residential proxies creates a powerful tandem for professional work with multiple accounts. GoLogin provides unique browser fingerprints, while Mango Proxy offers access to an extensive network of residential IP addresses, which together ensure maximum anonymity and protection against blocks.
Benefits of using Mango Proxy with GoLogin
For professional multi‑account work
- Dual layer of protection – changing both the browser fingerprint (via GoLogin) and the IP address (via Mango Proxy)
- Scalability – managing dozens or hundreds of profiles with different IP addresses
- Geo‑targeting – access to IP addresses from more than 190 countries to work with local markets
- Long‑term stability – residential proxies provide stable operation without sudden blocks
- High performance – fast connection thanks to the optimized proxy network
For marketers and SMM specialists
- Campaign segmentation by geography
- Monitoring local SERP for SEO analytics
- Safe management of client accounts in social networks
- Research of regional content and competitors
- Checking regional restrictions of advertising campaigns
Proxy setup in GoLogin
Starting GoLogin and creating a new profile
- Launch the GoLogin application on your computer.
- In the main interface, click the “Add profile” button in the upper right corner (highlighted with an orange arrow in the screenshot).
- In the drop‑down menu, choose the type of profile you want to create (e.g., a regular profile or a profile for a specific platform).
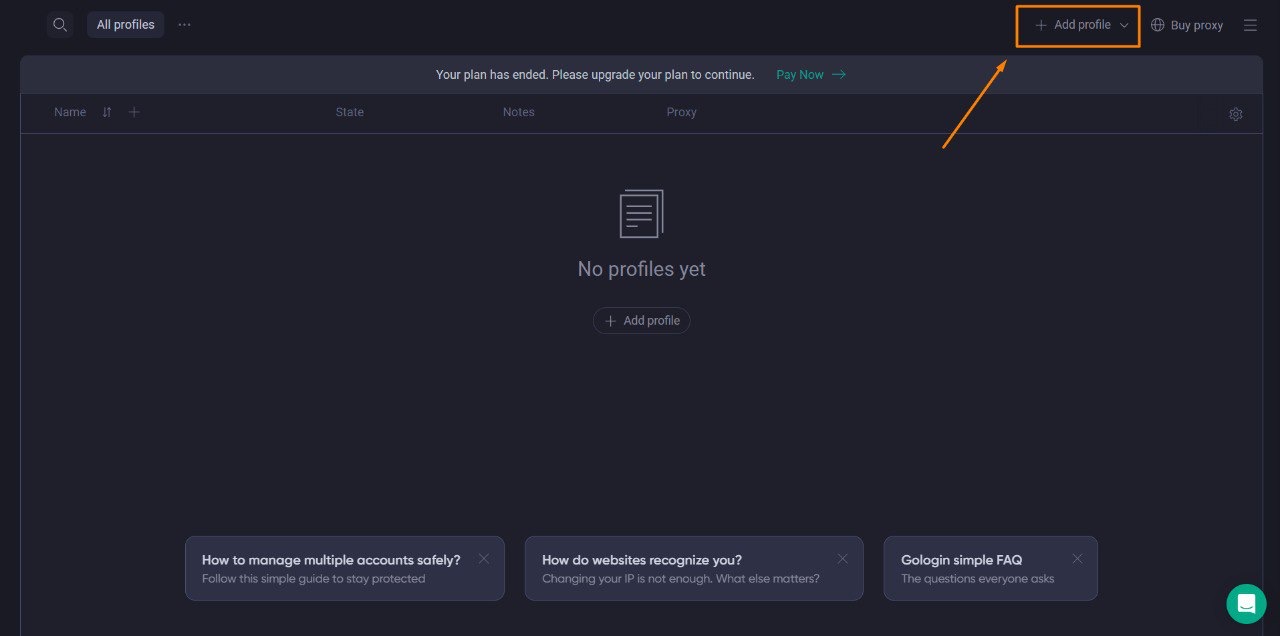
Main GoLogin interface with the highlighted “Add profile” button
Moving to proxy settings
- In the profile creation window, go to the “Proxy” tab in the top navigation bar (highlighted with an orange arrow).
- In the opened section, select “Your proxy” (highlighted with an orange arrow).
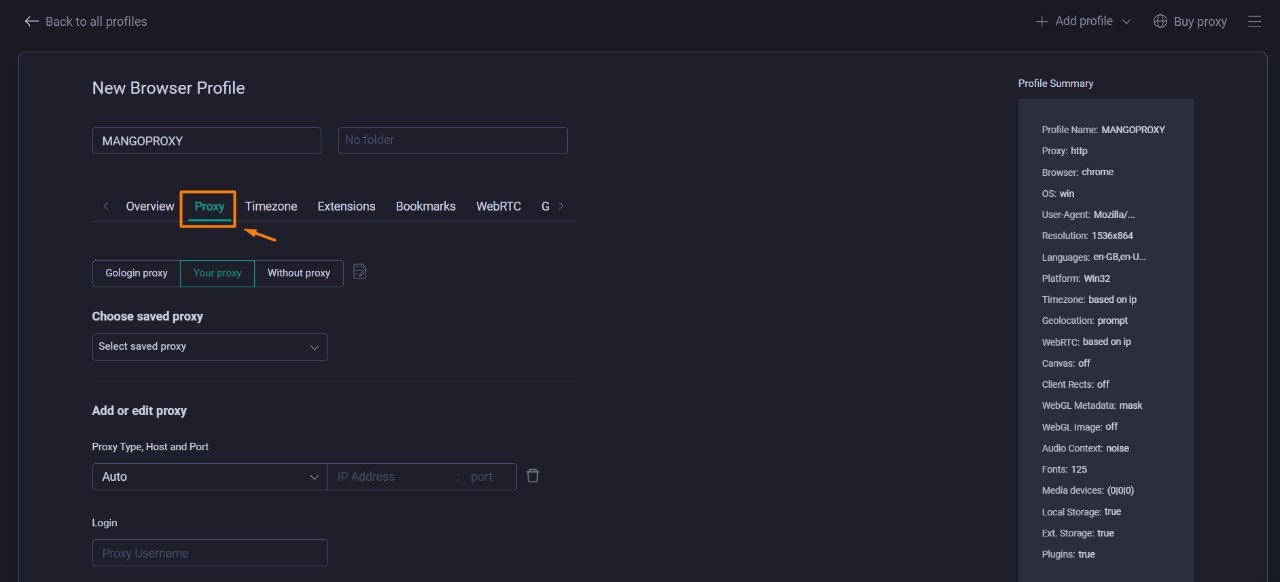
The “Proxy” tab in the GoLogin profile settings interface
Entering proxy data
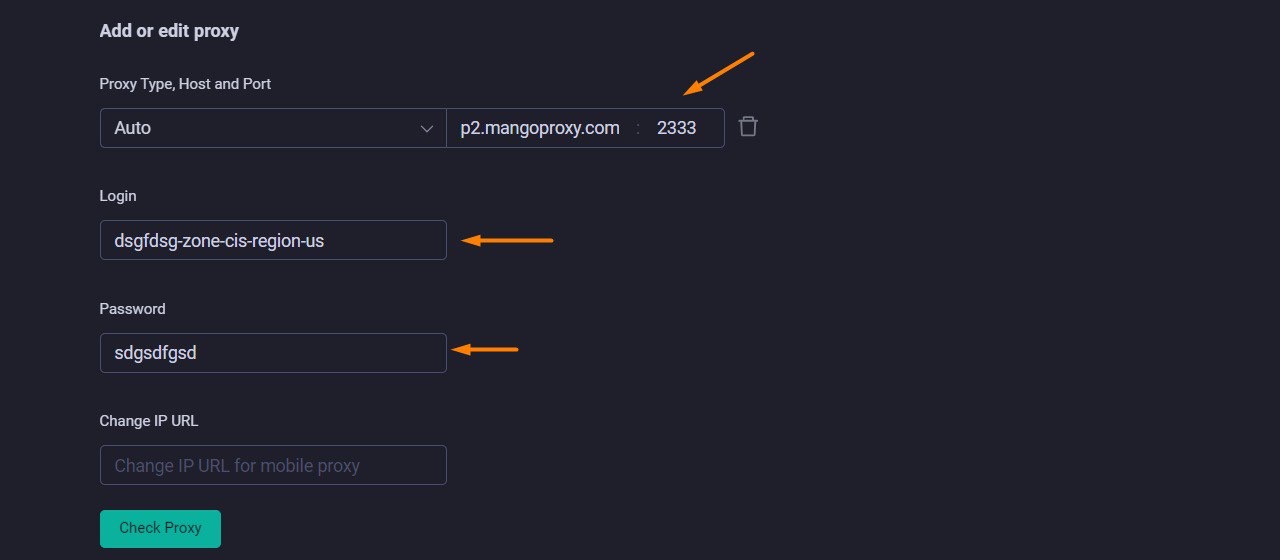
- In the “Add or edit proxy” section, fill in the following fields using the data obtained from Mango Proxy:
- Proxy type, host and port:
- Click the drop‑down menu and select “Auto” or a specific proxy type (SOCKS5, HTTP, HTTPS)
- Enter the host and port in the field next to it in the format
host:port(for example,p2.mangoproxy.com:2333)
- Username: Enter the login obtained from Mango Proxy
- Password: Enter the password obtained from Mango Proxy
- Proxy type, host and port:
Form for entering proxy data in GoLogin with highlighted fields
💡
Note: For more advanced settings, you can also specify a URL to change the IP address in the “Change IP address” field if you use proxy rotation.
Step 3: Checking functionality and starting
Checking the proxy
- After entering all proxy data, click the “Check proxy” button (highlighted with an orange arrow).
- In case of a successful connection, the system will show:
- The connection type (HTTP, SOCKS5, SOCKS4)
- The IP address assigned to you
- Connection speed in milliseconds
- Information about the country/region (e.g., “Proxy in Brazil • BR • Vespasiano”)
- Make sure that the location information corresponds to the selected settings in Mango Proxy and that the IP address differs from your real one.
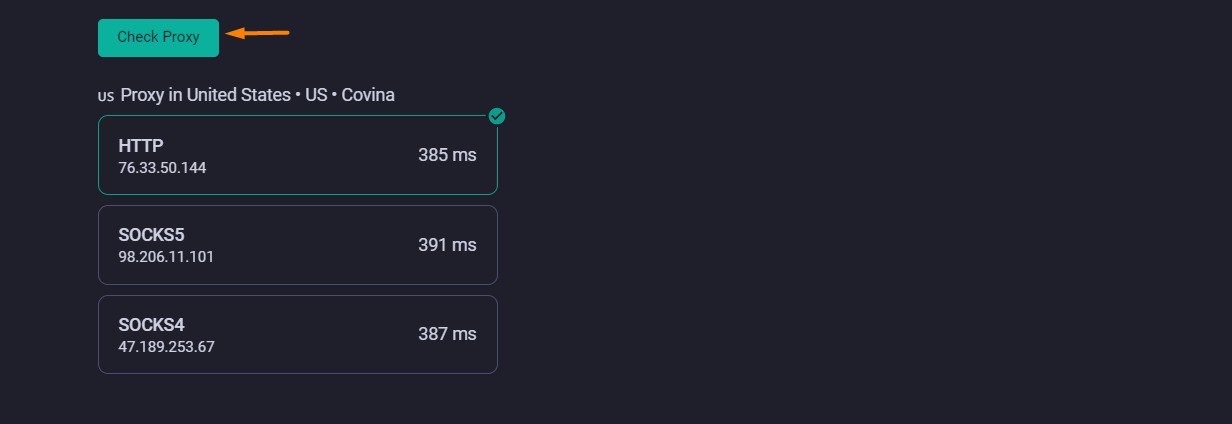
Result of the proxy check showing speed and IP address
Completing the setup and starting the profile
- After a successful check, click “Create profile” to save the settings (or the “Save” button if you are editing an existing profile).
- Your new profile with configured Mango Proxy will appear in the list of profiles.
- Launch the profile by clicking the “Start” button next to it in the main interface.
- A browser with a unique fingerprint and an IP address from Mango Proxy will open.
Best practices for using Mango Proxy with GoLogin
For working with social networks
- Connection stability:
- Use long sessions (1 hour or more) for stable operation
- Avoid frequent IP changes for the same account
- Choose IPs from the country of account registration
- Account security:
- Create a separate GoLogin profile for each account
- Assign a unique IP address to each profile
- Set the time zone and browser language to match the selected country
For marketers and arbitrage specialists
- Work organization:
- Create separate sub‑accounts in Mango Proxy for different projects
- Use tags and folders in GoLogin to structure profiles
- Save successful proxy configurations for reuse
- Scaling:
- Automate profile creation with different proxies via GoLogin API
- Use batch profile management for mass operations
- Document the profile–proxy–account bundles for better management
For working with advertising accounts
- IP address stability:
- Use maximum session durations (24+ hours if possible)
- For Facebook Ads and Google Ads, try to maintain the same IP
- Set autosave of cookies for seamless operation between sessions
This guide provides the basic steps for configuring Mango Proxy in GoLogin. For additional tips and troubleshooting, refer to Mango Proxy’s documentation and GoLogin’s support resources.