Proxy setup
After topping up your balance you can proceed to create and configure proxies in your Mango Proxy dashboard.
Choosing the type of proxy
You can choose one of the available types:
- Dynamic proxies — optimal for scraping, bypassing blocks and automation.
- Static proxies — suitable for registration, logins and stable account operation.
- ISP proxies — high‑speed IP addresses provided by providers.
- Data‑center proxies — ideal for high‑load and scaling tasks.
🎞️ Video tutorial “How to generate a proxy?”
📽️ Video tutorial: How to generate a proxy
This guide shows you how to efficiently create a proxy connection in Mango Proxy.
Step 1. Choose targeting
On the proxy generation screen two types of targeting are available:
- Country / Region / City — for geo‑targeting by geography.
- ASN — targeting by provider (internet operator).
Switch between them as needed.
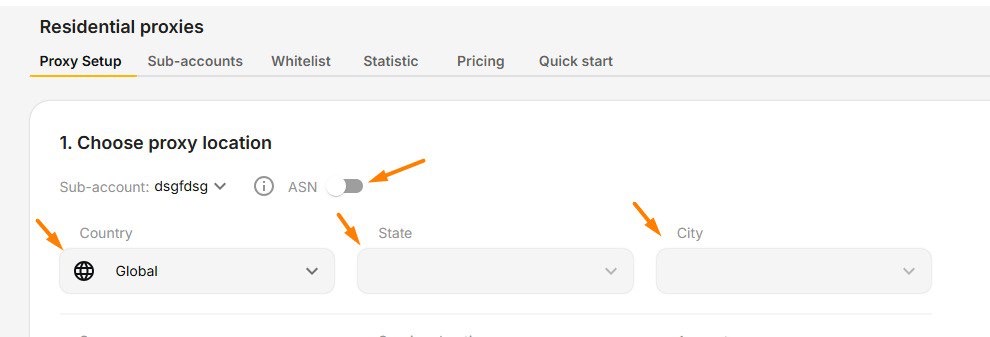
Step 2. Set up geography
- Click the “Countries” field.
- Use search or select a country manually.
- Choose a region, then a city — for example, Vladimir.
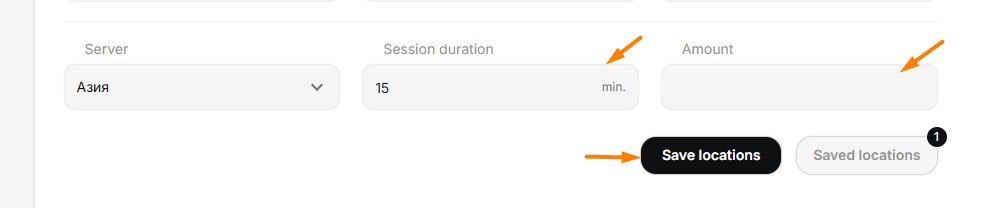
Step 3. Session duration
This parameter determines how often the IP will change:
0— every request gets a new IP.10— the IP changes every 10 minutes.
Step 4. Number of connections
Specify the number of IPs you want to generate (for example, 100).
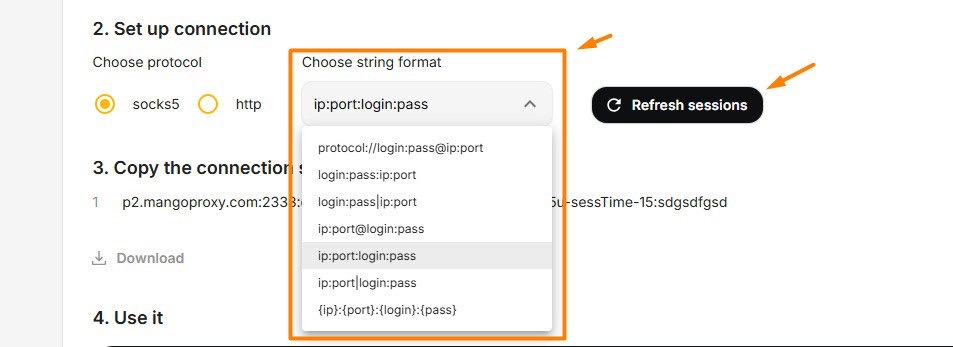
Step 5. Connection protocol
Select the desired option:
- SOCKS5
- HTTPS
- HTTP
Step 6. Integration with an anti‑detect browser
Follow these steps:
- Go to the “Browser” tab.
- Choose the required format (for example, Octo).
Step 7. Connection check
After generation click the “Check connection” button to ensure the proxy is configured correctly.
Step 8. Save and export
- Save the parameter template.
- Download the proxy list as a
.TXTfile. - Use the built‑in connection code generator.
Quick start
👉 Go to the control panel: my.mangoproxy.com
📘 See also: Account settings